
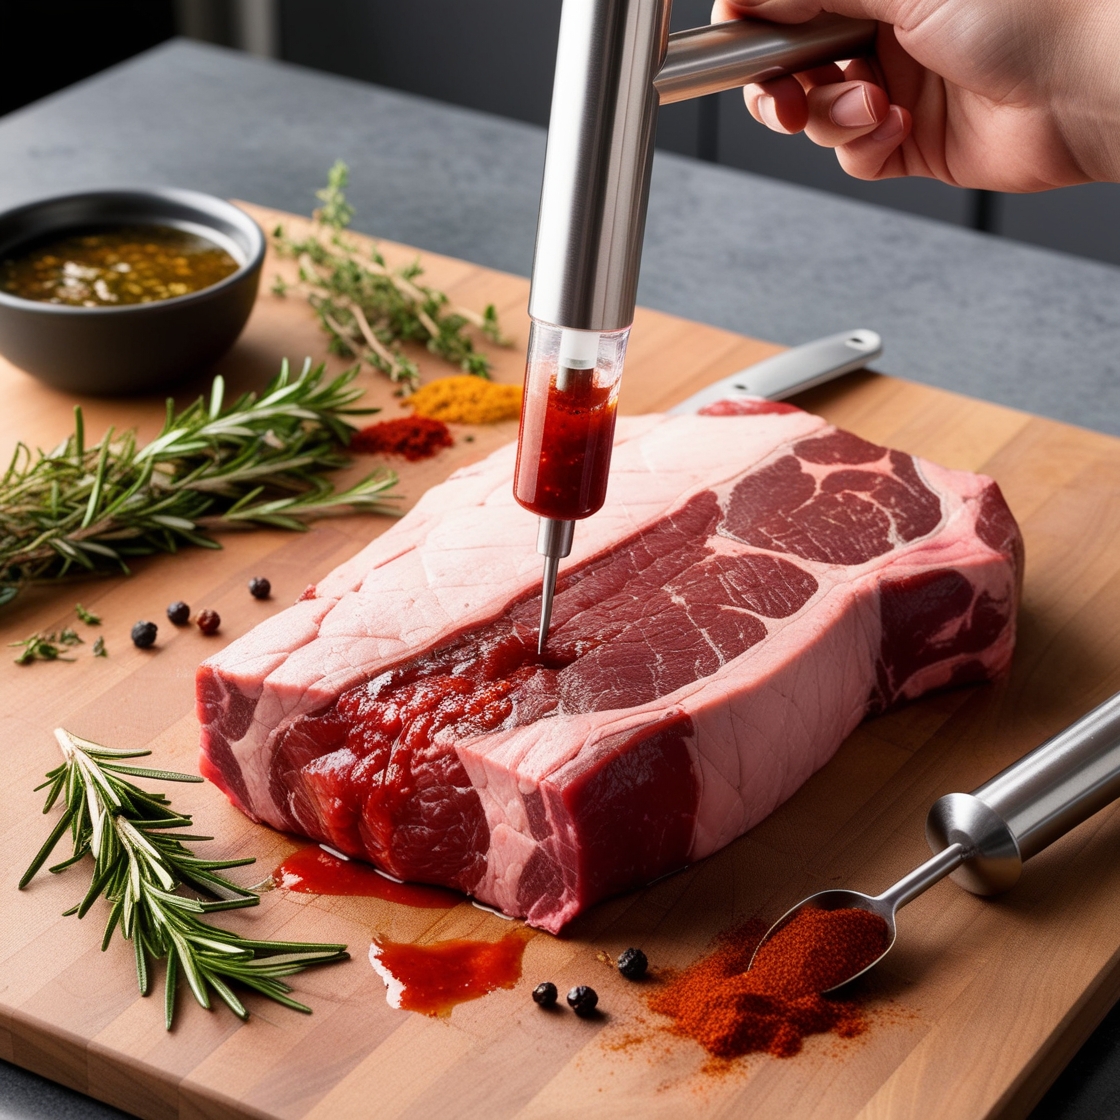
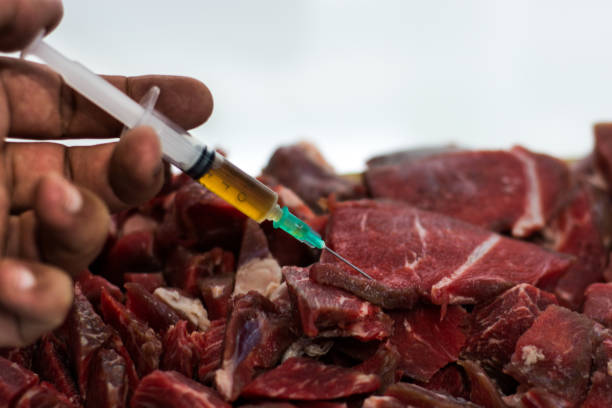
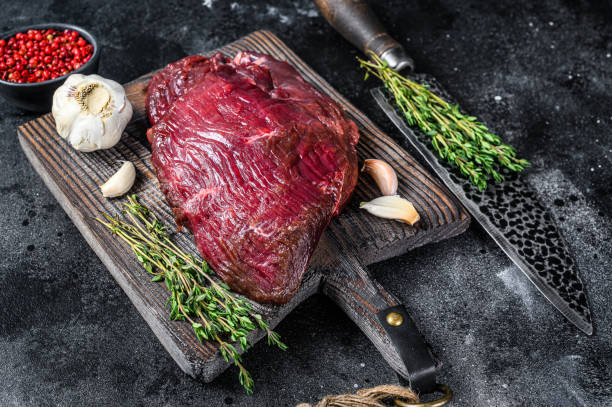
If you’ve ever taken a bite of a perfectly cooked steak or brisket and wondered how pitmasters get that deep, rich flavor in every bite, let me tell you—it’s not just about the rub or the marinade. One of the best-kept secrets in the BBQ world is using a meat injector to deliver flavor directly into the meat.
My love for steak started when I was 16, but running two steakhouses in Texas took that passion to a whole new level. I’ve spent years perfecting the art of turning good cuts into unforgettable bites—rich, juicy, and bursting with flavor. When people ask me the secret behind my melt-in-your-mouth brisket or ridiculously flavorful pork shoulder, my answer is always the same: I use a combination of techniques. I believe in the power of a great rub and a well-crafted marinade, but one of the most effective ways to enhance flavor is by injecting it deep into the meat with a quality meat injector, ensuring every bite is just as incredible as the last.
Let’s talk about why you should, too.

What is Meat Injection and Why Use It?
Traditional marinades only flavor the surface, but with injection, seasonings penetrate deep into the meat, ensuring every bite is juicy and full of flavor.
Here’s why I swear by this method:
- Moisture retention: Long cooking times, especially in BBQ, can dry meat out. Injection helps keep it juicy.
- Even flavor distribution: No more one-dimensional seasoning. Every inch of the meat gets the same attention.
- Faster absorption: Instead of waiting hours for a marinade to seep in, injection works instantly.
If you want to impress your guests—or just yourself—with consistently tender and flavorful meat, this technique is the way to go.
The History of Meat Injection
Most people think of injecting meat as a modern BBQ trick, but it has a long history. The concept started in the early 19th century when brine was used for preservation. Before refrigeration, injecting liquid helped keep meat from spoiling on long sea voyages.
Dr. John Morgan, a professor of anatomy at the University of Dublin, played a pivotal role in adapting this technique for preservation. His method involved injecting a liquid brine to speed up the curing process, which was important for food storage before refrigeration became widespread.
First Reactions to Meat Injector
At first, many people were doubtful about the idea. People were accustomed to dry curing and brining, so the thought of injecting liquid directly into the meat seemed unusual. In 1854, Morgan demonstrated his technique at a meeting of the Society of Arts in London. While some were intrigued, others dismissed it as unnecessary.
Despite the initial doubts, the method gained attention, especially for large-scale meat preservation. It was quickly adopted for industrial use, particularly for supplying preserved meat to sailors and soldiers. Over time, the technique evolved from a preservation method to an essential tool for enhancing flavor and moisture in cooking.
Injection vs. Dry Brining: Which Method Is Right for You?
While injection delivers flavor directly into the meat’s interior, dry brining works differently but can be equally effective in certain situations. Dry brining involves coating meat with salt and spices and allowing them to penetrate naturally over time—typically 24–48 hours.
Key Differences:
- Time Factor: Dry brining requires significant planning (1–2 days), while injection works immediately.
- Flavor Profile: Dry brining creates a more subtle, evenly distributed flavor, while injection can create pockets of intense flavor.
- Texture Impact: Dry brining can slightly firm up the exterior while keeping the interior moist; injection maintains a consistent texture throughout.
- Salt Concentration: Dry brining allows you to control exterior saltiness precisely; injection distributes salt internally, sometimes creating hot spots.
Many pitmasters actually use both techniques—dry brining for baseline flavor development and injection for moisture insurance and flavor enhancement in specific areas. For large cuts like brisket or pork shoulder, this combination approach often yields excellent results.

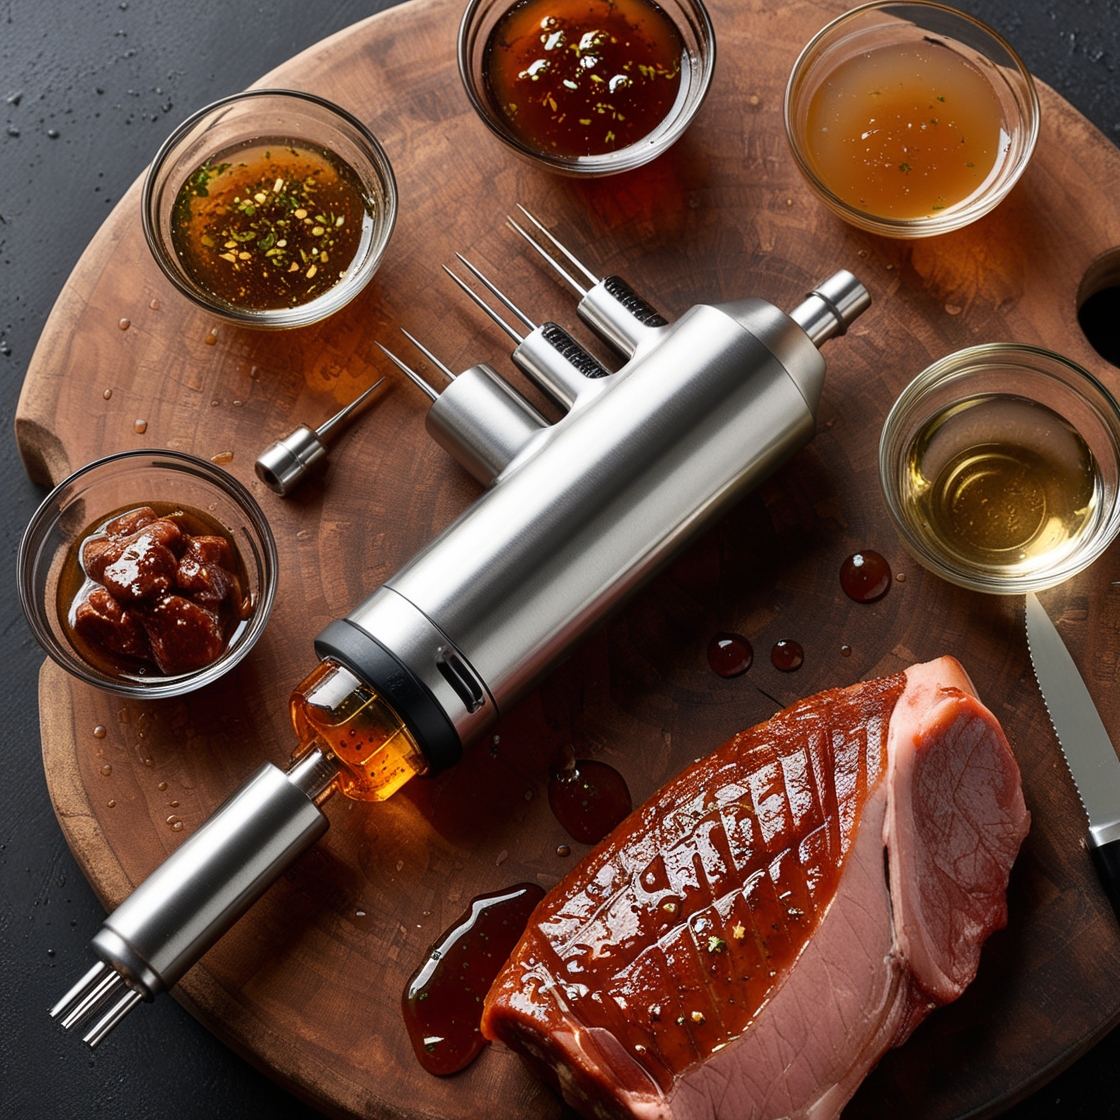
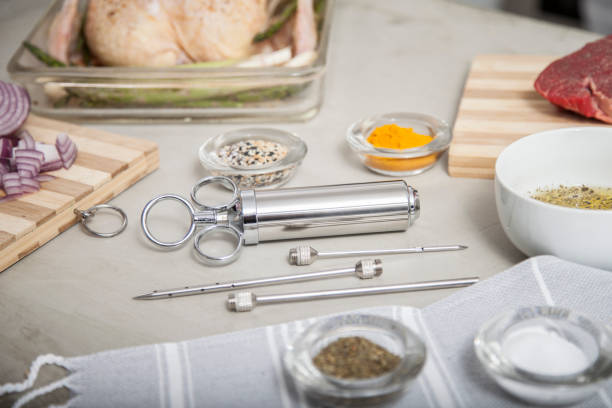
Choosing the Right Equipment
Not all injectors are created equal. Over the years, I’ve gone through my fair share of them, and here’s what you need to consider before buying one:
1. Needle Size Matters
- Thin Needles: Ideal for chicken, turkey, and thin cuts like steaks. These ensure precise injection without damaging the meat.
- Thicker Needles: Needed for big cuts like briskets, pork shoulders, or whole roasts. These can handle thicker marinades, including those with minced garlic or herbs.
2. Material Quality
- Stainless Steel: The best option. It’s durable, easy to clean, and resistant to rust.
- Plastic: Cheaper but not as reliable. They break more easily and don’t last as long.
3. Capacity
- If you’re cooking small cuts, a small-capacity model will do.
- For large briskets or whole turkeys, get a larger one to minimize refills.
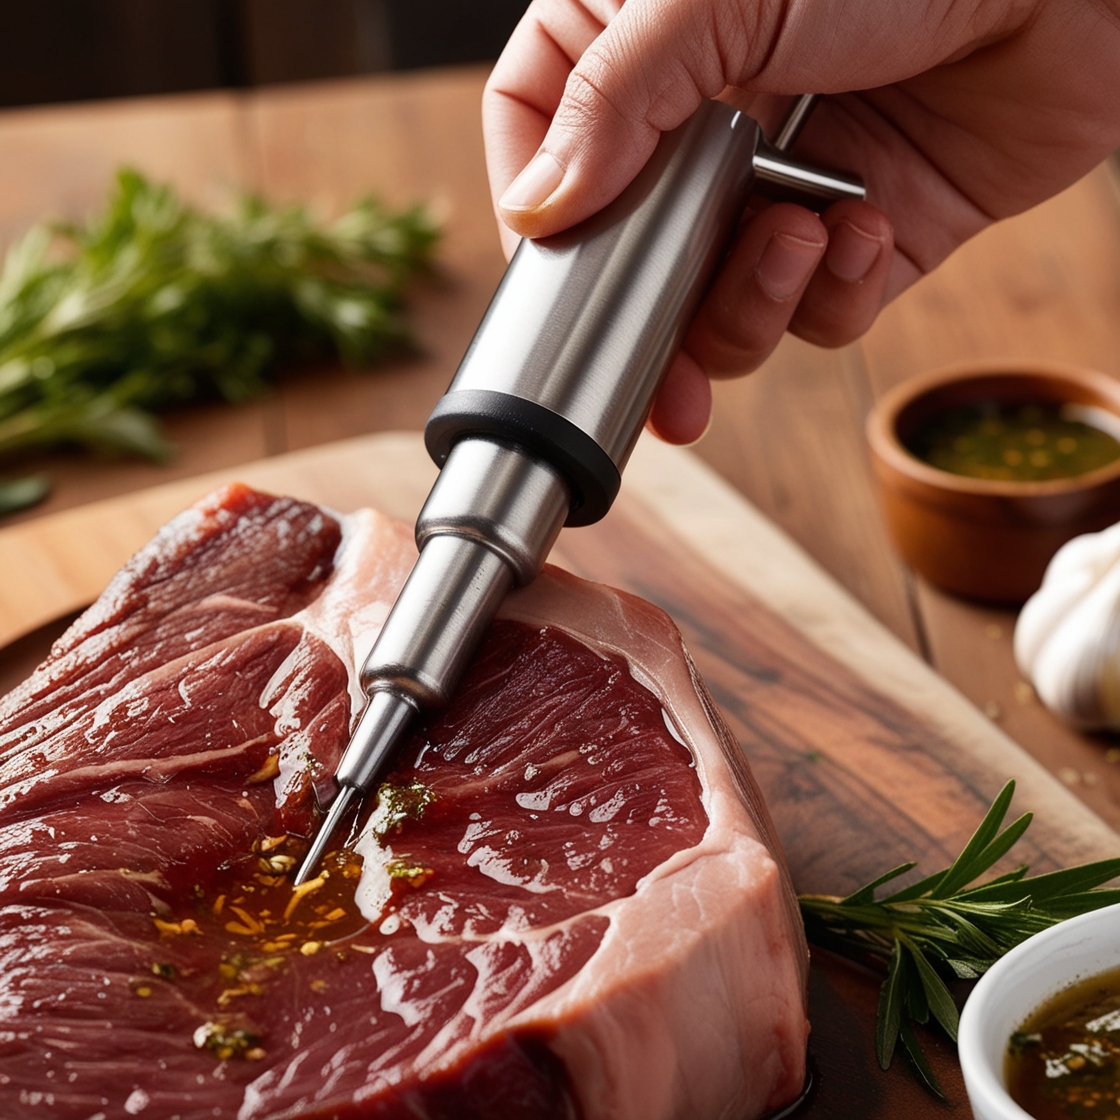
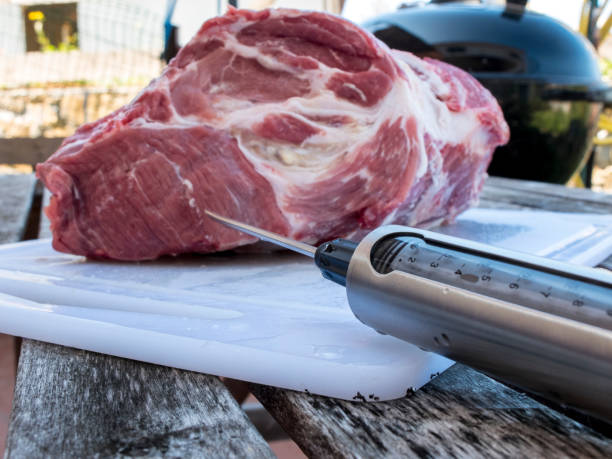
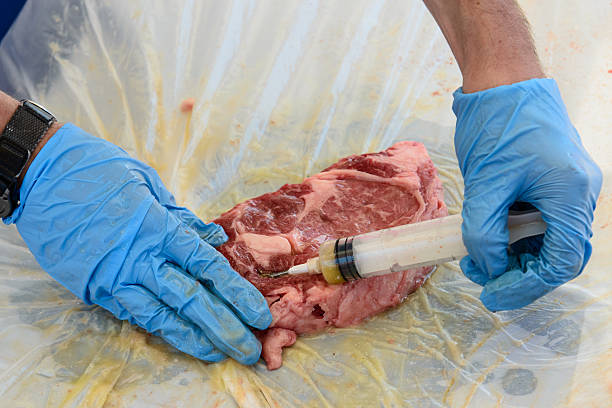
How to Inject Properly
Using this method isn’t complicated, but technique matters. Here’s how I do it:
Step 1: Prepare Your Marinade
You can go simple or complex. My go-to for brisket is a mix of beef broth, Worcestershire sauce, and a little melted butter. For pork, I like apple juice, cider vinegar, and a touch of brown sugar.
Whatever you choose, make sure it’s well-blended so it doesn’t clog the needle.
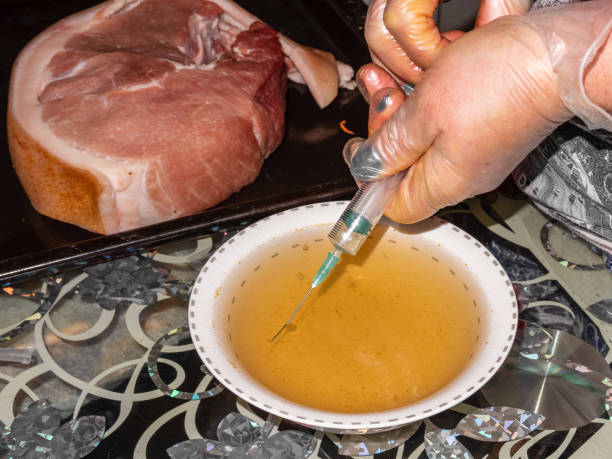
Step 2: Load the Syringe
- Submerge the needle into the marinade.
- Pull the plunger back slowly to fill the chamber.
- Tap gently to remove any air bubbles.
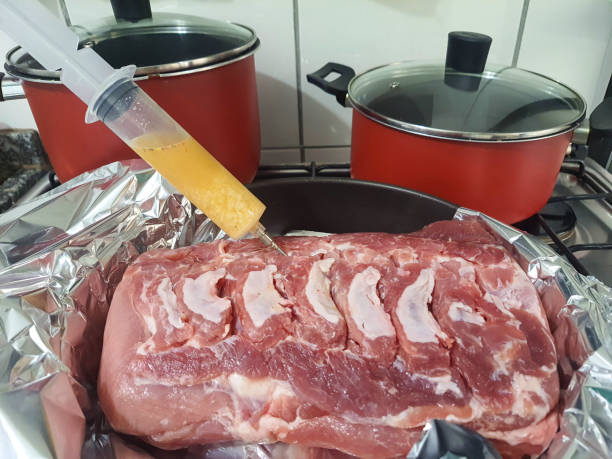
Step 3: Inject the Meat
- Insert the needle deep into the meat, avoiding bones.
- Slowly depress the plunger while pulling the needle out gradually. This helps distribute the marinade evenly.
- Repeat this in multiple spots to ensure full coverage.
A good rule of thumb is about one ounce of marinade per pound of meat—but this depends on how intense you want the flavor to be.
The Inner Workings of Meat Injection
Looking closely at injection reveals why it works so effectively because of what happens deep within the meat. When salt-based marinades enter the meat, they cause proteins to gently unwind, creating more space for moisture. The meat cells naturally absorb this added liquid while flavor compounds attach themselves to proteins and fats throughout the cut. This is why my injected briskets often taste more consistently seasoned than surface-treated cuts.
Different injection ingredients serve unique purposes inside the meat. Acidic elements like vinegar or citrus juice help soften tough connective tissues. Some competition barbecue experts use calcium chloride to speed up tenderization, while phosphates dramatically improve how much moisture the meat retains.
When alcohols from wine or beer are included, they help distribute fat-soluble flavors throughout the entire cut. Unlike traditional marinades that work gradually from the outside in, we know injection starts these processes immediately from within, giving flavors a head start before cooking even begins.

Common Mistakes to Avoid
Over the years, I’ve seen beginners make the same mistakes with their meat injectors. Here’s what NOT to do:
- Over-injecting: Too much liquid can make the meat mushy.
- Using the wrong needle size: A small needle can clog, while a large one can tear delicate meat.
- Injecting too fast: Go slow! If you push too hard, the liquid will squirt out instead of spreading inside the meat.
- Neglecting to clean your equipment: Rinse thoroughly after each use to avoid bacteria buildup.
Food Safety When Using Meat Injection Techniques
Introducing a needle into raw meat creates potential food safety concerns that should be addressed:
Bacterial Considerations
Each puncture site can potentially push surface bacteria deeper into the meat where temperatures may take longer to reach bacteria-killing levels. This is why proper cooking is essential with injected meats.
Temperature Guidelines
- Poultry: Cook to an internal temperature of 165°F (74°C)
- Beef/Lamb (ground): 160°F (71°C)
- Beef/Lamb (whole cuts): 145°F (63°C) with a 3-minute rest period
- Pork: 145°F (63°C) with a 3-minute rest period
Best Practices
After injecting meat, always refrigerate it immediately to prevent bacterial growth. Never reuse injection liquid that has come into contact with raw meat, as this can cause contamination. I recommend preparing more solution than you think you’ll need to avoid the risk of reloading with potentially contaminated liquid.
In my kitchen, food safety is a top priority, so using a reliable food thermometer to check temperatures in multiple locations—especially near injection sites—is essential before serving.
How Injection Affects Cooking Time and Process
Contrary to what many might expect, injecting can actually influence cooking duration and behavior:
Potential Changes to Cooking Time
- Increased Moisture: Injected liquids can extend cooking time by 5-15% as the additional moisture takes time to evaporate.
- Cold Liquids: Injecting cold liquid into room-temperature meat can lower the starting internal temperature, extending cooking time slightly.
- Composition Matters: Sugar-heavy injections may cause faster exterior browning, requiring temperature adjustments to prevent burning.
Cooking Process Adjustments
For injected meats, consider:
- Starting with a slightly lower smoking/cooking temperature (225°F instead of 250°F)
- Extending the wrap phase for briskets and pork shoulders
- Being prepared for a potentially longer stall period during smoking
- Monitoring internal temperature more frequently, especially if your injection contained sugars
Temperature Techniques for Injected Meats
Injected meats often benefit from specific temperature approaches:
Two-Stage Cooking
- Initial Low Temperature Phase: Start at 225-235°F (107-113°C) to allow the injected flavors to permeate and integrate without pushing too much liquid out.
- Finishing Phase: Increase to 250-275°F (121-135°C) to develop bark and complete the cooking process.
Resting Procedures
Injected meats often benefit from extended resting periods:
- Large cuts (brisket/pork shoulder): Rest for 1-2 hours in insulated containers
- Medium cuts (ribs/roasts): Rest for 30-45 minutes, tented with foil
- Small cuts (steaks/chops): Rest for 8-10 minutes before serving
This extended rest allows the injected liquids to redistribute and stabilize within the meat, reducing the likelihood of moisture loss when cutting.
Advanced Techniques
Once you get comfortable, you can experiment with more advanced methods:
Layered Flavor Injection
Try injecting in two phases—first with a simple brine for moisture, then later with a richer marinade closer to cooking time.
Using Different Liquids
Instead of just broth or juice, consider beer, wine, or even coffee for added depth and richness.
Herb and Spice Infusions
Grind herbs and spices into fine particles to mix into your marinade for extra bursts of flavor.
Vegetable Oil in Injection Mixtures
The strategic addition of oils to injection mixtures has become increasingly popular:
Benefits of Oil Inclusion
- Fat Carrier: Oils carry fat-soluble flavors that water-based liquids cannot
- Moisture Retention: A small amount of oil (10-15% of mixture) helps lock in moisture
- Mouthfeel Enhancement: Contributes to the rich, buttery quality of well-cooked meat
- Heat Distribution: Helps distribute heat more evenly through the meat during cooking
Oil Selection Guidelines
- Neutral Oils (canola, grapeseed): Best for subtle flavor profiles
- Butter: Excellent for beef and poultry, adds richness
- Olive Oil: Good for Mediterranean flavor profiles but can solidify in cold marinades
- Specialty Oils (sesame, chili): Use sparingly as accent notes (1-2%)
Emulsification Tips
Oil and water naturally separate, so proper emulsification is key:
- Add an emulsifier like mustard or egg yolk (1 tsp per cup)
- Blend thoroughly immediately before loading the injector
- Keep mixture warm to prevent solidification of fats
- Shake or stir frequently if preparing in advance
Regional Takes on Meat Injection
Just like barbecue itself, injection techniques reflect regional cooking traditions and flavor preferences. In Texas, my experience has shown that simplicity reigns supreme. Many legendary Texas barbecue experts stick to minimal injections—often just beef broth and salt—letting the quality of the meat speak for itself. Some innovative Texans add coffee or espresso to beef injections for depth, but the philosophy remains focused on enhancing rather than masking natural flavors.
Kansas City approaches injection with its characteristic sweet touch. Their injection solutions frequently include molasses or brown sugar, paired with more complex spice profiles. When working with pork, we’ve noticed they often incorporate apple juice or cider to complement the region’s sweeter rubs and sauces.
Carolina barbecue enthusiasts favor vinegar-heavy injections, especially when preparing whole hog. Their solutions commonly include pepper flakes for even heat distribution and make frequent use of fruit juices like apple or peach in pork preparations. Memphis methods strike a balance between sweet and savory, often incorporating dry rub spices directly into the injection liquid. Many Memphis cooks use mustard as an emulsifier in their solutions.
Internationally, injection styles reflect diverse culinary traditions. Argentine injections often incorporate elements of chimichurri. Korean approaches frequently combine soy sauce, pear juice, and garlic for beef, while Australian barbecue lovers have developed a fondness for beer-based injections, particularly when preparing lamb.

Competition BBQ and Injection Secrets
In the competitive BBQ circuit, injection is nearly universal among top competitors. Few champions would consider competing without this essential technique in their arsenal.
Competition Trends
Phosphate use dominates the competition scene. Many competitors rely on sodium phosphate to maximize moisture retention. Flavor layering has become standard practice. The best teams often apply multiple injections at different stages, sometimes 24 hours apart. Commercial bases provide consistency. Many champions start with proven commercial injection bases, then customize them with signature ingredients.
Winning Techniques
The most successful competitors approach injection with scientific precision. Injection patterns are meticulously mapped out. Many use grids marked on the meat for consistent application. Temperature monitoring focuses on injection sites. Probes are strategically placed to ensure proper cooking where liquid concentrates. Strategic injection targets vulnerable areas. Careful application helps compensate for parts prone to drying, such as brisket edges or the flat portion.
Regional customization can make the difference between good and great scores. Top teams tailor specific flavor profiles to known judge preferences in different competition regions. While home cooks don’t need these extremes, these competition techniques highlight how effective and important injection has become in achieving truly outstanding BBQ results.
Adapting Regular Marinades for Injection Use
Not all marinades work well in injectors, but many can be modified:
Conversion Guidelines
- Strain thoroughly: Remove all particles larger than 1mm to prevent clogging
- Reduce thickness: Thin overly thick marinades with appropriate liquid (broth, juice)
- Intensity adjustment: Reduce salt by approximately 30% compared to exterior marinades
- Acid reduction: Cut acid components (vinegar, citrus) by 50% to prevent mushiness
- Oil balance: Keep oils to 15% or less of total volume
Flavor Concentration
Since injected marinades reach the interior directly, you can often reduce quantities:
- Use 50-75% of the spice amount in the original recipe
- Increase water-soluble components slightly
- Decrease oil-soluble components slightly
Recipe Conversion Example
Original Marinade:
- 1 cup soy sauce
- ½ cup olive oil
- ¼ cup lemon juice
- 3 tablespoons minced garlic
- 2 tablespoons herbs
Injection Adaptation:
- ¾ cup soy sauce (reduced sodium preferred)
- 2 tablespoons olive oil
- 2 tablespoons lemon juice
- 1 tablespoon garlic powder (not minced)
- 1 tablespoon dried herbs (finely ground)
- ¼ cup beef broth (to thin mixture)
This conversion maintains the flavor profile while making it suitable for injection use.
The Challenge of This Technique
Meat injection isn’t always foolproof. Excessive injection can make delicate meats mushy. Uneven application creates pockets of moisture beside drier sections. Flavors might concentrate in specific areas. This leads to inconsistent texture and taste in the final product.
Technical issues can arise during cooking. Injection holes sometimes leak, causing flare-ups on grills. Some injection mixtures interfere with proper bark formation on the outside of BBQ cuts. The process can push carefully applied exterior seasonings off the meat. These problems affect both appearance and flavor development.
Learning proper injection technique takes practice. My first attempts resulted in marinade squirting back out of the meat. Many new users experience uneven distribution of flavors. There’s also risk of damaging delicate cuts with improper needle technique. Despite these challenges, most problems can be avoided with practice. The benefits of perfectly injected meat make the learning curve worthwhile for anyone serious about barbecue.
Recommended Products
If you’re ready to buy an injector, here are some I recommend:
- Cave Tools Stainless Steel Kit: Durable, easy to clean, and great for all types of meat.
- Ofargo Stainless Steel Syringe: A good budget-friendly option.
- J&B Goods Professional Automatic Model: Ideal for serious BBQ enthusiasts who inject frequently.
Safety and Hygiene Tips
Since meat injection involves puncturing the meat, keeping everything clean is crucial. Always sterilize your injector before and after use by boiling it or running it through the dishwasher if it’s dishwasher-safe. Store it completely dry to prevent rust and bacterial growth, and avoid cross-contamination by using separate tools for different meats or thoroughly cleaning between uses. A little attention to hygiene ensures your BBQ is both delicious and safe.
Final Thoughts
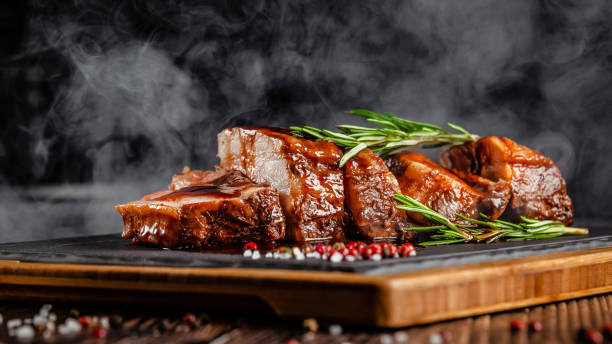
Meat injection is a powerful technique that delivers moisture, flavor, and tenderness from the inside out, transforming ordinary cuts into extraordinary BBQ that will impress even the most discerning guests.
While some of us may be accustomed to traditional cooking methods passed down through generations, there’s nothing wrong with deviating from convention. Everything evolves—including our culinary techniques and flavor preferences. We should never stop learning and discovering new approaches in the kitchen. Our palates are the ultimate judges, and they often surprise us when we venture beyond our comfort zones. Innovation has always been at the heart of great cooking.
So, next time you fire up the smoker, grab your injector and give it a shot. Experiment with different flavors, try new techniques, and taste the difference in every bite. Your BBQ journey is just beginning—let meat injection be your next delicious adventure!
