Pan Seared Steak: Best Way To Cook
There’s something undeniably alluring about a perfectly pan seared steak in cast iron skillets – the deep, caramelized crust, the juicy interior, and the rich, beefy flavor that lingers on your palate. For steak enthusiasts, achieving that coveted sear is a culinary quest, and one of the best tools to help you attain perfection is a trusty cast iron skillet.
Cast iron skillets have been a staple in kitchens for generations, and for good reason. These versatile pans are renowned for their ability to retain and distribute heat evenly, making them ideal for searing steaks and achieving that sought-after crust.
With proper technique and care, a well-seasoned cast iron skillet can become your secret weapon in creating restaurant-quality steaks right in your own kitchen.
Table of Contents
- 1 Understanding Cast Iron Skillets
- 2 Choosing the Right Steak
- 3 Preparing the Steak
- 4 Preheating the Cast Iron Skillet
- 5 Pan Seared Steak Techniques
- 6 Finishing Pan Seared Steak in the Oven (Optional)
- 7 Resting the Steak
- 8 Serving and Plating Pan Seared Steak
- 9 Cleaning and Caring for Your Cast Iron Skillet
- 10 Conclusion
Understanding Cast Iron Skillets
Cast iron skillets have been in use for centuries, dating back to the early 1800s when they were a common sight in campfires and pioneer kitchens. Today, they remain a favorite among home cooks and professional chefs alike for their durability, heat retention, and ability to develop a natural, non-stick surface through seasoning.
One of the key advantages of using a cast iron skillet for steak cooking is its ability to achieve and maintain high temperatures. The dense material of cast iron allows it to get scorching hot, which is essential for achieving that coveted sear on the steak’s surface.
Additionally, cast iron skillets distribute heat evenly, ensuring that the entire cooking surface is consistently hot, preventing hot spots that can lead to uneven cooking.
Proper seasoning and maintenance are crucial for getting the most out of your cast iron skillet. Seasoning involves coating the pan with a thin layer of oil or fat, which polymerizes and creates a natural, non-stick surface. This process not only prevents sticking but also protects the pan from rust and enhances its ability to distribute heat evenly.
With regular use and proper care, a well-seasoned cast iron skillet can last for generations, becoming a cherished kitchen heirloom.
Choosing the Right Steak
The success of your pan seared steak hinges on selecting the right cut of meat. While most steak cuts can be pan seared, certain cuts lend themselves better to this cooking method. Some of the best options include:
- Ribeye: Known for its rich flavor and generous marbling, the ribeye is a classic choice for pan searing. The marbling ensures a juicy, tender texture when cooked properly.
- Strip Steak (New York Strip): This tender and flavorful cut is another excellent option for pan searing. Its consistent thickness makes it easy to achieve an even sear.
- Filet Mignon: While leaner than other cuts, the filet mignon’s tenderness makes it a popular choice for pan searing. Its delicate flavor pairs well with compound butters or sauces.
- Skirt Steak or Flank Steak: These flavorful but tougher cuts benefit from the high-heat searing technique, which helps break down the muscle fibers and tenderize the meat.
When selecting your steak, consider the marbling (the thin streaks of fat running through the meat), as well as the thickness. For optimal searing, choose steaks that are at least 1 to 1.5 inches thick, with visible marbling throughout. The marbling not only adds flavor but also helps keep the steak moist and tender during cooking.
It’s also essential to bring your steak to room temperature before cooking. This step ensures that the steak cooks evenly from edge to edge, preventing an overcooked exterior and an undercooked center. Simply remove the steak from the refrigerator about 30 minutes to an hour before cooking, depending on its thickness.
Preparing the Steak
Once you’ve selected your steak, it’s time to prepare it for searing. One essential step is dry brining or salting the steak. This process involves generously coating the steak with salt (preferably coarse kosher salt or sea salt) and letting it rest at room temperature for at least 30 minutes, or up to an hour. The salt draws out moisture from the steak, which is then reabsorbed, resulting in a more flavorful and tender steak.
After the dry brining process, pat the steak dry with paper towels. Removing any excess moisture from the surface is crucial for achieving a proper sear, as moisture can prevent the browning reaction from occurring.
Optionally, you can also baste the steak with a thin layer of oil or melted butter before searing. This step can help promote even browning and add an extra layer of flavor. However, it’s not strictly necessary, as the high heat and proper technique should be sufficient for achieving a beautiful sear.
Preheating the Cast Iron Skillet
Proper preheating is essential for successful pan searing. Cast iron skillets require ample time to reach the desired temperature, so it’s important to start heating the skillet well in advance.
Place your cast iron skillet on the stovetop and preheat it over medium-high to high heat for at least 5 to 10 minutes. If you have a large, thick skillet, you may need to preheat it for even longer. The key is to allow the pan to get ripping hot, as this intense heat is what will create that coveted sear on the steak’s surface.
Alternatively, you can also preheat your cast iron skillet in the oven. This method can be particularly useful if you plan to finish cooking the steak in the oven after searing. Simply place the skillet in the oven while it’s preheating to a high temperature, typically around 450°F to 500°F (230°C to 260°C).
Regardless of the preheating method you choose, it’s crucial to exercise caution when handling the hot cast iron skillet. Use oven mitts or potholders to protect your hands, and be mindful of the intense heat emanating from the pan.
Pan Seared Steak Techniques
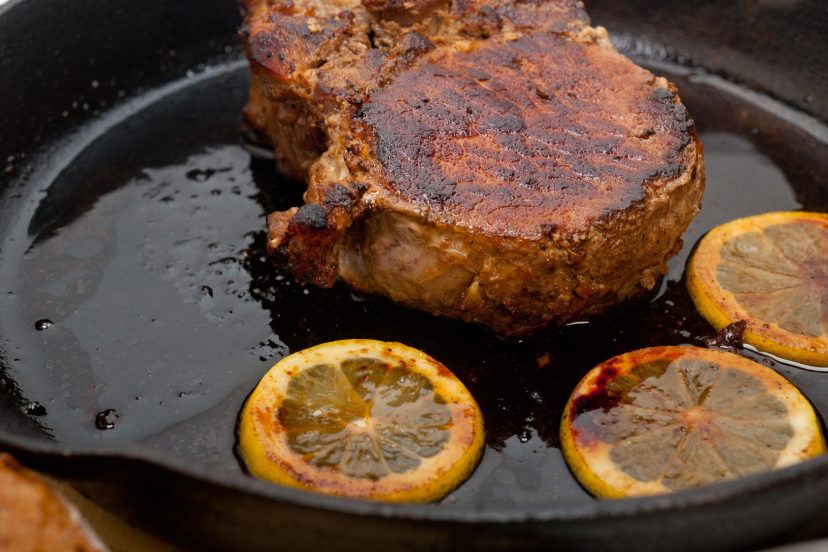
Once your cast iron skillet is preheated to the desired temperature, it’s time to sear your steak. Start by adding a small amount of oil or clarified butter to the skillet, just enough to create a thin coating on the surface. This step helps prevent sticking and enhances the browning process.
Carefully place the steak in the hot skillet, being cautious of any splattering oil or fat. Use tongs or a spatula to gently press down on the steak.
Once the steak is in the hot cast iron skillet, resist the urge to move it around too much. Allow it to sear undisturbed for 2 to 4 minutes, depending on the thickness of the steak and your desired level of doneness. This initial sear is crucial for developing that coveted crust and locking in the juices.
Flipping the pan seared steak over
After the initial sear, use tongs or a spatula to flip the steak over. You should notice a beautiful, caramelized crust forming on the seared side. If the steak seems to be sticking to the pan, gently nudge it with your tongs or spatula until it releases. Once flipped, sear the other side for an additional 2 to 4 minutes.
Basting technique
If desired, you can employ the basting technique while searing the pan seared steak in cast iron skillet. Tilt the skillet slightly and use a spoon or basting brush to scoop up the hot oil or butter from the pan and pour it over the top of the steak. This not only adds flavor but also helps promote even browning and cook the steak more evenly.
Pay close attention to the color and aroma of the steak as it sears. The crust should develop a rich, deep brown color, and you should detect the enticing aroma of caramelized beef. If the steak starts to smoke excessively or the crust appears to be burning, reduce the heat slightly to prevent overcooking.
Finishing Pan Seared Steak in the Oven (Optional)
While some steaks can be cooked to your desired doneness solely on the stovetop, thicker cuts may benefit from finishing in the oven. This two-step cooking method ensures that the interior of the steak is cooked to perfection while maintaining that coveted sear on the outside.
If you choose to finish your steak in the oven, preheat it to a high temperature, typically around 450°F to 500°F (230°C to 260°C). After searing the steak on both sides in the cast iron skillet, carefully transfer the entire skillet to the preheated oven.
Use an instant-read meat thermometer to monitor the internal temperature of the steak as it cooks in the oven. Keep in mind that the steak will continue to cook slightly after being removed from the heat, so aim for an internal temperature that’s 5 to 10 degrees lower than your desired doneness.
For reference, the recommended internal temperatures for various levels of doneness are:
- Rare: 120°F to 125°F (49°C to 52°C)
- Medium-Rare: 130°F to 135°F (54°C to 57°C)
- Medium: 140°F to 145°F (60°C to 63°C)
- Medium-Well: 150°F to 155°F (66°C to 68°C)
- Well-Done: 160°F (71°C) and above
Remember, the oven method is optional and may not be necessary for thinner steaks or if you prefer a rare to medium-rare doneness. Always use a meat thermometer to ensure accurate and consistent results.
Resting the Steak
Resting the steak is a crucial step that should never be skipped, regardless of whether you finished cooking it in the oven or on the stovetop. During the cooking process, the muscle fibers in the steak contract, squeezing out moisture. If you slice into the steak immediately after cooking, those precious juices will spill out, leaving you with a dry, disappointing steak.
To prevent this, always allow the steak to rest for at least 5 to 10 minutes before slicing into it. This resting period allows the muscle fibers to relax and reabsorb the juices, resulting in a more tender and juicy steak.
During the resting period, tent the steak loosely with aluminum foil. This helps retain the heat and prevents the steak from cooling too rapidly, while also allowing any excess moisture to escape.
It’s important to note that the steak will continue to cook slightly during the resting period due to carryover cooking. This phenomenon occurs because the heat from the exterior of the steak gradually transfers inward, slightly increasing the internal temperature. For this reason, it’s essential to remove the steak from the heat source a few degrees before it reaches your desired doneness.
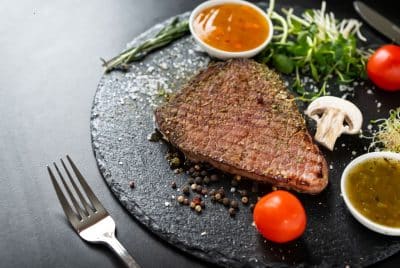
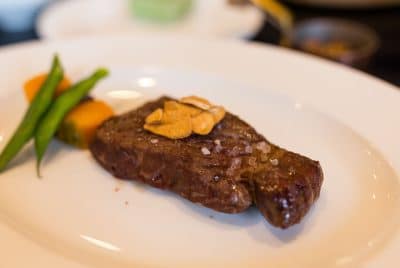
Serving and Plating Pan Seared Steak
After the steak has rested, it’s time to slice and serve your pan seared steak in cast iron skillet. Always slice the steak against the grain, which refers to cutting perpendicular to the direction of the muscle fibers. Slicing against the grain shortens the muscle fibers, resulting in a more tender and easier-to-chew steak.
When plating your pan seared steak, consider adding complementary accompaniments or sauces to enhance the flavor. A simple compound butter, such as garlic herb butter or blue cheese butter, can add a rich and decadent touch.
Alternatively, you can drizzle the steak with a flavorful pan sauce made from the browned bits (fond) left in the cast iron skillet after searing. Some classic accompaniments for pan seared steak include:
- Roasted or sautéed mushrooms
- Caramelized onions
- Crispy potato wedges or roasted potatoes
- Steamed or grilled vegetables (asparagus, broccolini, etc.)
- Fresh herbs (parsley, thyme, rosemary)
When plating, arrange the steak slices attractively on the plate, allowing any juices or sauce to pool around the meat. Consider garnishing with fresh herbs or a sprinkle of coarse sea salt for an added touch of presentation.
Cleaning and Caring for Your Cast Iron Skillet
Proper care and maintenance of your cast iron skillet are essential for ensuring its longevity and preserving its non-stick properties. After cooking, allow the skillet to cool slightly, but not completely. While it’s still warm, use a stiff-bristled brush or a chain mail scrubber to remove any stuck-on bits or residue from the cooking surface.
Avoid using soap or harsh abrasives, as these can strip away the seasoning and potentially damage the surface of the skillet. Instead, use a small amount of coarse salt or a paste made from oil and salt to help scrub away any stubborn residue.
Once the skillet is clean, rinse it thoroughly with hot water and dry it immediately with a clean cloth or paper towels. It’s essential to remove all moisture to prevent rust from forming.
After drying, you can choose to re-season the skillet by applying a thin layer of oil or melted shortening to the cooking surface. This step helps maintain the non-stick properties and protects the cast iron from rust. Wipe away any excess oil with a clean cloth or paper towel, leaving only a thin, even coating.
When storing your cast iron skillet, it’s best to place a paper towel or a thin layer of oil inside to absorb any moisture and prevent rust. Alternatively, you can store the skillet in a dry, well-ventilated area.
With proper care and seasoning, your cast iron skillet will become a cherished kitchen companion, capable of producing perfectly seared steaks and countless other delicious dishes for years to come.
Conclusion
Mastering the art of pan seared steak in a cast iron skillet is a skill that takes practice and patience, but the rewards are well worth the effort. There’s something deeply satisfying about achieving that perfect sear, with its rich, caramelized crust and juicy, flavorful interior.
By following the techniques outlined in this article – from selecting the right steak and properly preheating your cast iron skillet, to mastering the searing and resting processes – you’ll be well on your way to producing restaurant-quality steaks in the comfort of your own home.
Remember, cooking is an ever-evolving journey, and experimentation is key to finding your perfect method. Don’t be afraid to tweak and adjust the techniques to suit your preferences and taste buds.
The beauty of cast iron cooking lies in its simplicity and versatility, allowing you to create culinary masterpieces with just a few high-quality ingredients and a well-seasoned skillet.
So, gather your ingredients, preheat your trusty cast iron, and embrace the art of pan seared steak. With each sizzling steak, you’ll gain confidence and skill, ultimately elevating your steak game to new heights of deliciousness.
*We may earn a commission for the purchases made using our links. Please see our disclosure to learn more.